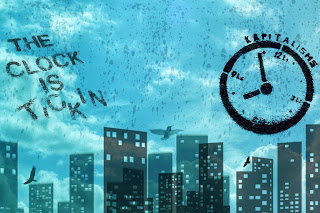


I found these mood boards quite difficult, but very worth while. Having never done or heard of a mood board before, it was quite daunting being asked to produce 5 of them!


This weeks Tutorial was more difficult than i originally thought. It also had a lot more steps in the proccess than i thought.
Firstly i found 2 photo's and took them into Photoshop. I cut out certain objects in the photo of the farm and turned them into their own layer, this way i could animate them separately. So for example i used the lasoo tool to cut out the barn, then cut out the wheat and the hills in the background etc. I found this quite time consuming, and if i was going to do this exercise again, i would choose simpler pictures.
After separating the objects in the picture, i used the clone tool to extend the images, to fill in some of the transparency which resulted in cutting out objects in the picture.
Once i was finished I then loaded the photo shop file into After Effects as a composition, this way i could animate the individual layers how i wanted, and change there position individually.
I changed each layers z positioning to give the illusion of depth in the composition.
I then followed the techniques from the 3D Composition video that Chris had a up loaded on Blackboard and imported a camera into the composition to create the 3D effect.
After key framing the camera's movement and position, i masked out the plane from my second picture and added it to the main composition and gave it the illusion of flying infront of the mountains.
The things i like about my composition is the constant movement off the camera, i like how it's taking the viewer through the composition and makes the viewer feel part of the composition instead of an outside looking in.
The things i dont like about the final composition are as follows.
1. Im not satisfied with the quality of cloning i did in photoshop, im not very familiar with photoshop, and i feel that my cloning was average, if i was going to do this exercise again i would look up on the internet cloning techniques in photoshop to make it look more realistic.
2. I think that i may have rotated the camera a little bit too much when focusing on the plan at the end, the angles are so tight that it make the composition look much more un-realistic. If i was going to do this again, i would do more cloning and make the background image larger so that it would be easier to rotate the camera's point of view, and i would also have the camera further back from the subject to make it even more realistic.
In Conclusion i learned a lot about 3D compositioning in After Effects, but i also learned a lot about the photoshop program, and am excited to now know a few techniques which i will be able to use in my final assignment.
 This weeks tutorial was very beneficial to me because it taught me technique's which i would very much like to use in my final assignment. The graffiti look, in my mind, is very cool, and now i know how to apply the techniques and tamper with curves etc, i feel it opens up more doors for me motion graphic wise.
This weeks tutorial i had a lot of fun. I also really liked the final product that i finished with along with all the skills that i learnt from this exercise.
When making the Mad Macks advert i remembered all the silly Solly's and Crazy Clarks adds that i had seen since i was a kid and tried to replicate these techniques. This resulted in what i think as a little bit cheesey and simple advert, although very effective non the less.
What i like about my advert is how the shapes and words fly out at you but then look as if they bounce on the ground when they fly back towards the background. I like how i have figured out how to do a stroke through the old price. To do this, i used the beam effect which may not be the easiest way to do this im sure, but is the only way i knew how. I fiddled with the beam effect settings such as starting point, ending point, time and length, until it looked as if someone was putting a red marker through the price. I then simply copied these settings and applied them to my other compositions.
I learnt a lot of easier ways to do things through this exercise, i learnt that copy and pasting settings to layers is a lot quicker and easier, than creating, and manually tinkering with each one.
When i first starting using after effects, i thought it was quite messy due to the amount of layers that you use, how ever because of this exercise i have learnt to make more than one composition and simply add them into the main comp. This is so much more organised and i found it a lot more simple to edit.
In conclusion if i was to do this exercise again i would probably try to use the wiggler tool, i attempted to use it this time to get the wiggle effect on my prices, how ever did not have much success in getting it to do what i wanted. I would also maybe try and make each product appear in there own unique way, rather than just copying and pasting.
So far i have learnt the most from this exercise, and look forward to applying them to my assignment.
In this weeks exercise i found it very worthwhile, having never learnt about masking in after effects i was very excited to have the chance to use the new masking tool.
The area i chose to do an identity for was the beach, i love going to the beach and i thought it would hold a lot of different options for animating. I wanted to diliver the message that the beach is for everyone, and that mostly everyone enjoys the beach and has fond memories there. That is why i came up with the catch line," The Beach, The life!" This was ment to relate to the saying "This is the life", emplying that by going to the beach and enjoying yourself, was the life.
In my animation i used pictures of differnt people at the beach, an olderman, a woman holding a surf board, a middle aged man and a little boy finally at the end. I used people for different domographics to relay the message that the beach is for everyone. If i was to do this exercise again i would probably getting better pictures of the people, and a better picture of the beach, possibly a photo of the beaches horizen on the water, rather than on an angle.
I made the background picture of the beach black and white, because i like this effect and i feel it brings a lot of emphasis to the other pisctures of the people which are in colour.
The animation i put together was rather simple, and i felt it was a little boring, although it used all the masking techniques that i had been taught, i still felt it was missing something. Over all how ever i found this exercise very usefull, and great practice in using the usefull masking tool which will be very usefull for my animation assignment.
In this Tutorial exercise i was learning the roles of the key frames with in After Effects. Being that i am a little, and i do mean a little experienced with the After Effects program, i found the whole exercise well worth the time because it refreshed my memory of the program.
In this exercise i basically made the poster's fly around in the sky, but i also made them inter act with one another, for example having them crash into each other and then act accordingly, attempting to replicate what would happen in real life.
I worked with the poster's rotation key frames as well as there position, scale and anchor point key frames. By tinkering with all these aspects off the poster, i was able to make them look as if they were actually flying around and reacting off one another.
In conclusion, even though this finished project may have been a little boring and nothing amazing, i still found this exercise very re warding, and a good exercise in learning about the role of key frames with in After Effects.